09 Jan 2025 • 5m read • 17m video
When and how to replace your dirtbike chain

Charlie Frost Author
As an avid dirt bike rider, keeping your chain properly maintained is crucial for optimal performance and safety. In this article, I'll be showing you when it's time to replace your chain and walking through the full process step-by-step.
Knowing when your chain is stretched too far and needs replacing is important to prevent excess wear on other components and avoid potential issues out on the trails. Replacing a dirt bike chain yourself allows you to save on shop fees and learn more about caring for your bike. I'll share the techniques I use as a pro rider to efficiently swap out a stretched chain for a fresh one.
Whether you're a beginner or experienced rider, this guide will equip you with the knowledge to identify if your chain needs replaced and master this essential maintenance task. So let's get started!
Know When It's Time for a New Chain
Knowing when to replace your chain is important to extend the life of your drivetrain components. An indication that it's time for a new chain is when the chain adjuster bolt on the swingarm is positioned quite far back. This shows that the wheel is coming backwards out of the swingarm as the chain stretches over time. Typically when the adjuster bolt is at its limit, about halfway back, it's a good time to change the chain. This will allow you to push the wheel forward again and start fresh with the adjuster positioned at the front. The longer you keep the old stretched chain on, the further back the adjuster will be pulled. In this video, the adjuster bolt still has some room left before needing replacement, probably good for another 5-10 rides. But it's demonstrated how to change out the chain now to a new MX lightweight 520 racing chain.
Prepare for Chain Replacement
Before installing the new chain, you need to remove the old one.
Start by locating the split link and positioning it at the top of the rear sprocket. This keeps it in place and makes it easily accessible.
Next, put the bike into gear so that the rear wheel can't move. This allows you to work on removing the chain without it spinning. Use a set of pliers to disconnect the split link and remove it from the chain.
Then insert a flathead screwdriver into the link plates to push out the link pins. Once the pins are removed, you can pull the chain off the sprockets and guide it out.
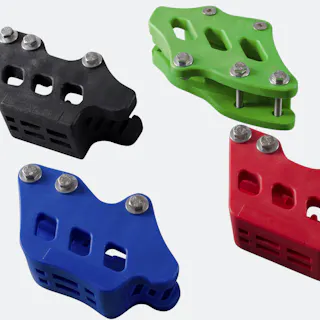
With the old chain and split link disconnected, the bike is now ready for the new chain installation. Be sure to inspect and clean the chain guide and sprockets while you have better access, removing any built up dirt, grease or debris before fitting the replacement chain.
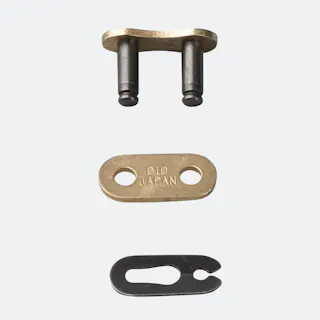
When installing the MX lightweight 520 racing chain you have two options: rivet, or split link. In the video and moving forward in this article i'm demonstrating using the split link. Just like I had on the old one.
Install New Chain
Installing the new chain is a multi-step process.
First, reset both chain adjusters all the way forward to allow maximum chain life as it stretches over time.
With the adjusters forwarded, thread the new chain through the guide sliders and around the front and rear sprockets. You may need to spin the sprockets to feed the chain through smoothly.
Once threaded, determine how many excess links need removal to achieve the proper chain length. Use a chain breaker tool to push out the chain pins and remove these excess links.
With the chain now at the ideal length, install new split link connectors to join the ends of the chain. Make sure the split link clips are securely fastened.
Finally, begin evenly adjusting chain tension on both the left and right sides. The goal is to achieve adequate tightness without over-tensioning a new chain. Adjust tension identically on both sides so the wheel remains straight.
Finish Up
After installing the new chain and setting the proper tension, it's important to finish up by securing everything properly.
First, use a wrench to tighten the rear wheel nut so that the wheel stays aligned with the swing arm.
Next, tighten the nuts on the chain tension adjusters with a wrench to lock the adjusters in place. Give the wheel nut one more check to make sure it's tight.
Finally, spin the wheel to confirm it rotates freely without any binding now that the new chain is installed.
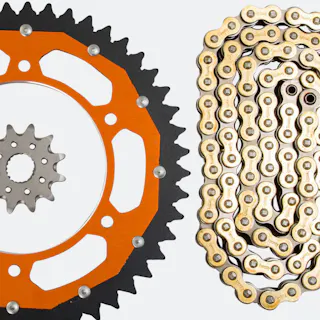
As I mentioned in the video, it's ideal to replace the sprockets when you replace the chain. The sprockets wear over time just like the chain, so installing fresh sprockets along with the new chain is the best way to go. However, if you're on a budget or the sprockets still seem to be in decent shape, you can opt to just replace the chain. In that case, be diligent about checking the condition of the sprockets so you replace them before they wear too far and damage the new chain.
FAQs
Conclusion
Installing a new dirt bike chain is an essential maintenance task to keep your bike running smoothly. As I demonstrated in this article, it's important to regularly check your chain tension and wear. When the adjusters are nearing their limits or the chain is overly stretched, it's time for replacement. With some basic tools and mechanical skills, you can swap out a worn chain for a fresh one in short order.
Author information
My name is Charlie Frost, and I'm no stranger to the adrenaline-fueled world of extreme enduros. Starting my journey at 19, I seamlessly blended trials and enduro racing, honing my skills through youth events and extreme races like the Tough One and Erzberg. When I'm not tearing through rugged terrain, you can often find me in front of the 24MX camera, sharing my passion and insights with fellow riders, as we delve into the exhilarating world of off-road racing.