12 May 2025 • 5m read • 5m video
How to change gear shift lever on a dirt bike

Author Charlie Frost
Replacing a gear shift lever is a common maintenance task for dirt bike riders. Whether your lever is damaged from rocky terrain or showing signs of wear, this guide will walk you through the replacement process.
Tools Required
8mm spanner
Maintenance spray
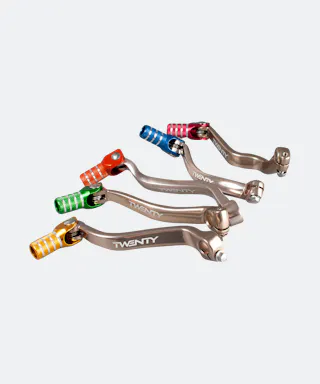
New gear shift lever


Removing the Old Gear Lever
Start by locating the 8mm locking nut underneath the gear lever. While modern KTM, GasGas, and Husqvarna models typically have an easily accessible bolt on the outside, some bikes (like Beta) use an underneath locking nut system.
Begin by loosening this locking nut with your 8mm spanner. If your bike has the sump guard removed, you can use a socket from underneath. However, working with a spanner from above is perfectly fine when the sump guard is attached.
Once loose, carefully remove the bolt completely while ensuring it doesn't fall into the sump guard. With the bolt removed, wiggle the gear lever until it comes free from the spline shaft. Take a moment to inspect the spline for any damage, corrosion, or dirt. A quick spray with maintenance spray will ensure a clean surface for the new lever.
Installing the New Gear Lever
Before installation, it's worth understanding when replacement is necessary. Common signs include:
Excessive play in the lever end piece
Bent or misshapen lever
Complete breakage from impact with rocks or obstacles
When fitting the new lever, first loosen its locking nut to allow proper positioning on the spline. The key to correct installation is achieving the right height - this is crucial for proper operation.
Getting the Position Right
Avoid these common positioning mistakes:
Setting the lever too low, which can affect shifting comfort
Mounting it too high, which risks catching the chain during upshifts
Align the lever so it's parallel with the ground and check that it clears the chain throughout its range of motion. Once positioned correctly, thread the locking nut back through the gear lever. Start by hand-tightening before using the spanner for final torque.
Final Checks
Before considering the job complete, perform these essential checks:
Ensure the locking nut is properly tightened
Test the gear lever's movement through all gears
Verify there's no contact with the chain in any position
Check that the lever feels firm with no wobble
With these steps completed, your new gear shift lever should provide reliable shifting for many rides to come. Remember that proper installation is crucial for smooth gear changes and avoiding potential damage to your dirt bike's transmission.
FAQs
Author information
My name is Charlie Frost, and I'm no stranger to the adrenaline-fueled world of extreme enduros. Starting my journey at 19, I seamlessly blended trials and enduro racing, honing my skills through youth events and extreme races like the Tough One and Erzberg. When I'm not tearing through rugged terrain, you can often find me in front of the 24MX camera, sharing my passion and insights with fellow riders, as we delve into the exhilarating world of off-road racing.